In the landscape of digital marketing, data may be the most powerful feature, empowering success and diminishing missed opportunities. One tool that can definitely help us in our noble pursuit of analytics is UTM (Urchin Tracking Module) parameters. In this post, we scroll through Dynamic UTM Parameters – time-saving and even life-saving parts of them especially for a performance marketer. Particularly, we focus on those used on the Meta Advertising Platform.
So, what are UTM parameters?
UTM stands for Urchin Tracking Module, a name that might not sound exciting but has historical significance. These parameters were first introduced by Urchin, the predecessor of Google Analytics.
Built into Google Analytics by default, UTM parameters help track your traffic without needing additional setup, though you can customize them as needed.
The main purpose of UTM parameters is to provide detailed information about where your traffic and conversions originate. This ensures you get a coherent set of data about your campaigns in your Google Analytics property.
To do their job and track the effectiveness of your marketing efforts, UTM codes have to be appended to the end of an URL.
For example, if you’re running a Black Friday sale on shoes and traffic comes from a Google Search campaign that triggered the ad variant A when a user searched for the keyword ‘shoes’, your URL might look something like this:

When a user interacts with this link, valuable tracking data is sent to your Analytics tool, letting you perform the marketing magic and make informed decisions. Without them we wouldn’t know anything about where or how users came to our site.
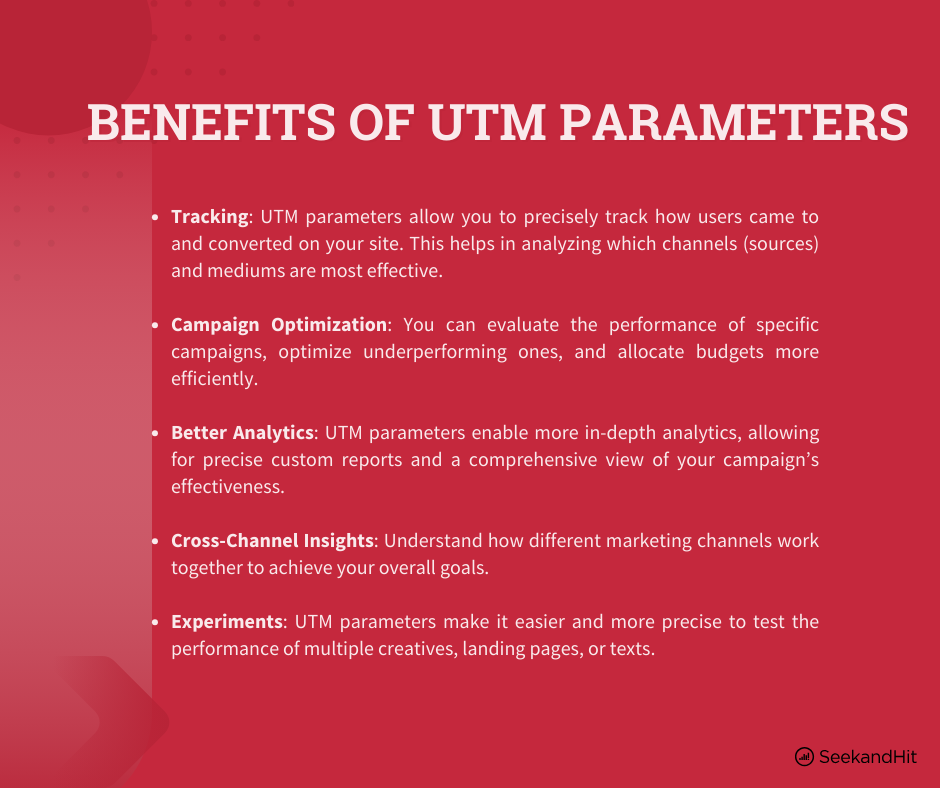
We won’t delve into the details of UTM parameters in this blog. For more information, check our previously published blog on UTM parameters in Google Analytics, and below you’ll find the 5 top benefits of UTM parameters.

Dynamic UTM Parameters in Facebook Ads Manager
As previously mentioned, UTM parameters are built-in into Google Analytics, but unfortunately this convenience mostly applies for Google sources. That means you don’t have to manually name them for your Google campaigns, although you have the option to do so if needed.
But what if you run Meta ads? Then, the life of a performance marketer becomes just a little bit harder.
Unlike Google, Meta ads require you to manually input values for UTM parameters. For example, if you need to specify the medium as paid or CPC to differentiate it from organic traffic or other sources. The same goes for other parameters – you input them in any way that makes sense for your campaign.
Thankfully, dynamic UTM parameters can simplify this process.
Dynamic UTM parameters
Dynamic UTM parameters are codes that automatically adjust based on user interactions generating the necessary tracking information (like source, medium, and more) on the fly as users engage with your content. This automation can make your tracking setup more advanced, or perhaps simpler, depending on how you see it.
With dynamic UTM parameters, there’s no need to create separate ad sets for each source or manually input UTM values, reducing redundant tasks. Managing, analyzing, and optimizing your social media ad campaigns just became much easier.
When Meta first introduced dynamic UTM parameters in 2018, the following options were available :
{{ad.id}}
{{ad.name}}
{{adset.id}}
{{adset.name}}
{{campaign.id}}
{{campaign.name}}
In 2019 Meta improved this system by introducing two new UTM parameters :
{{site_source_name}} – Automatically identifies source platform (e.g., Facebook, Instagram, Audience Network and Messanger)
{{placement}} – Indicates where your ad was placed (e.g., feed, story, Marketplace)
So previously, to accurately track your traffic, you had to create two ad sets – one for Facebook, one for Instagram, and separate ad sets for different placements like feed and stories. This could result in four ad sets just for one campaign!
Now, you can just bundle them in one ad set and it will automatically collect data showcasing the source and placement where the interaction happened. Pretty life saving if you ask me.
Note however that name-based parameters are set according to how your campaign, ad set, or ad was named when initially published. If you change the naming in Ads Manager after publishing, the UTM parameter values won’t update—they’ll still reflect the original names. To change these values, you’d need to publish a new campaign, ad set, or ad.
How to set up Dynamic UTM Parameters in Facebook Ads Manager
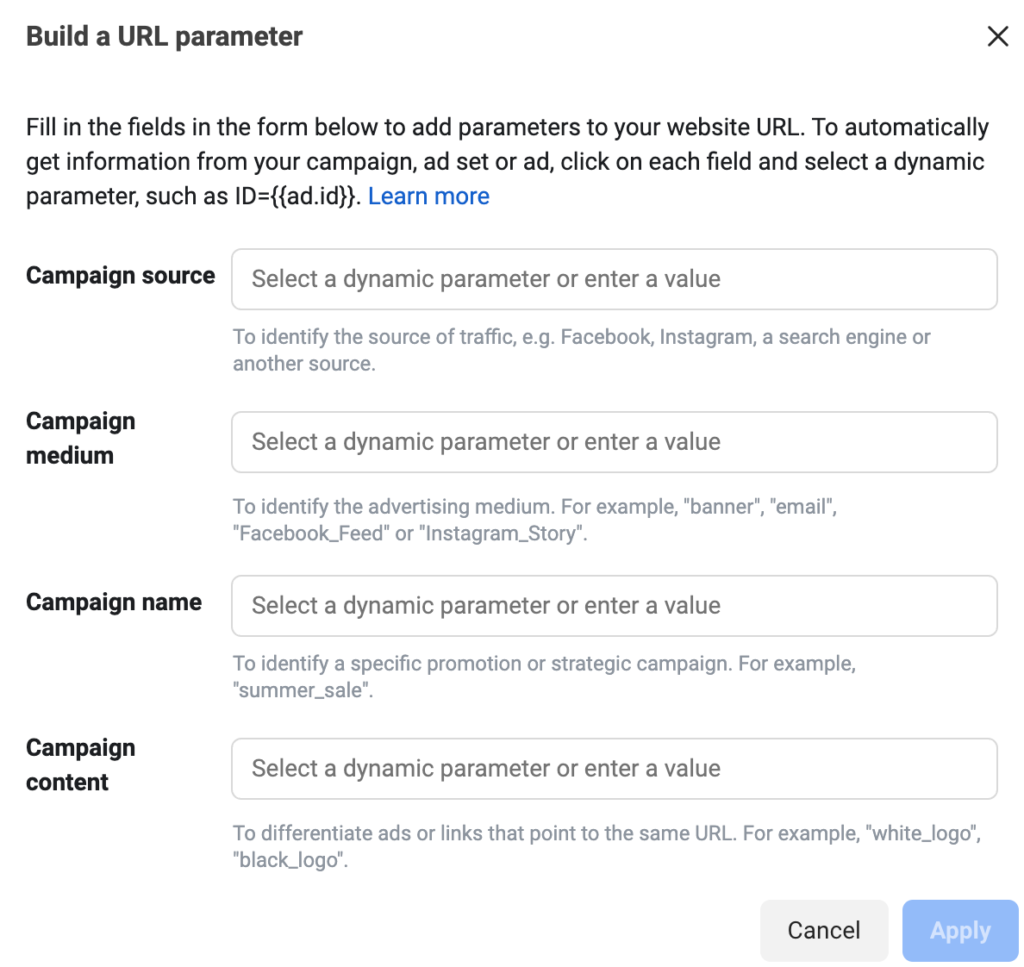
Now to the fun stuff. To set up dynamic UTM parameters in Facebook Ads Manager go to Ad level and scroll down until you see a section that says URL parameters. Select Build a URL parameter and you should be greeted with this :

Obviously, you can manually input them with standard (non-dynamic) UTM parameters or you can just select any empty field and it will automatically offer you all of the available Dynamic UTM Parameters.
Select those that make the most logical sense to you, click Apply, and voilà! you have a string of parameters that will automatically tell you where your traffic came from (at least regarding the Meta ad space).
Then you can paste them to all of your other ads (strongly recommended) or you can try to play around with different parameters on other ads (not so strongly recommended).
Below is an example of a string of Dynamic UTM parameters you can use.
Note however that there isn’t any right or wrong way to set them, but it purely depends on what works best and makes the most sense to you.
utm_source={{site_source_name}}&utm_medium=cpc&utm_campaign={{campaign.name}}&utm_content={{placement}}
Note: The medium is not dynamic in this example because it’s set to a constant value (cpc). Since this string is used exclusively for ad traffic, the medium remains consistent.
Pro Tip: If you have multiple ad sets within a campaign targeting different locations, consider including {{adset.name}} or {{campaign.name}}-{{adset.name}} for clearer analysis.
With this setup, if you run multiple campaigns across Meta platforms and placements, you’ll be able to see in your Analytics tool exactly where your traffic is coming from—whether it’s Instagram, Facebook, or another Meta source, along with details like campaign name and placement (feed, story, etc.) responsible for that traffic.
All of this valuable data is automatically collected with a single UTM parameter string, created in under two minutes (or copied from this article in seconds). This approach saves you the hassle of creating separate ad sets for each source and placement and manually entering UTM parameters for each one.
Still think that I was joking when I said this stuff is life-saving?
Additional resource: Google’s Campaign URL Builder


